Toner Foil as an alternative to Hot Foil Letterpress:
No it well never be as nice, or as fast, as letterpress foiling or hot stamping, but it is cheaper to do and could be fine for smaller runs. It’s somewhat slow going for someone used to feeding 20-40 sheets a minute, but the set up/clean up is easy. The downside is that there is no impression, but the upside is the affordability (no need for a $40-200 magnesium die) and range of decently priced foil colors.
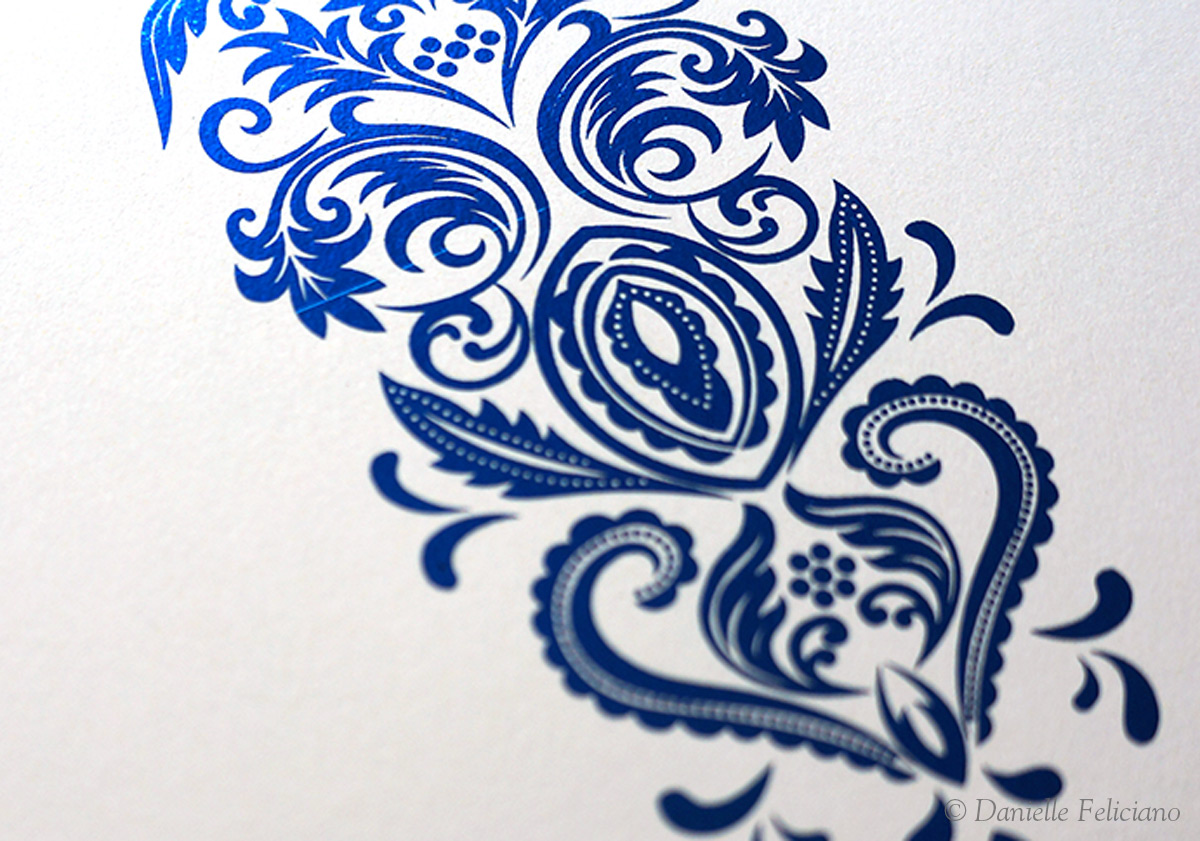
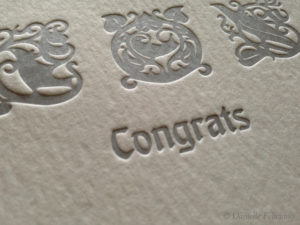
So this week I wanted to try out some hot toner foiling on a few different papers and see which papers might work in concert with letterpress/ laser foiling. Essentially, this is a process where you print an image on a laser printer, apply the foil over top, and run it through high heat and pressure causing the foil to bind to the styrene plastic in the toner.
I went to PulsarProfx.com and bought a sample pack of foils (they have tons of colors), bought an Apache hot laminator from Amazon and got to work. I have this huge industrial Neopost color laser printer that was given to me, and so I’ve been working with that. Unfortunately, the toner is insanely expensive (like 200 a color, guess that’s why I got the printer free haha) so I ran into some trouble when I got low on the black. I found printing in a color like Navy blue for me led to better toner coverage and made results better since I was so low on black. It’s good to note any color toner will work for this so long as the toner contains enough styrene (plastic) in it to allow the bond. I did some samples using prints I did on a HP printer (in the actually Office Depot store, the employee was super cool about helping me – I just printed the files from a USB on their display printer) and those worked fine when you bumped up the density.
Here is some of the process, below that you’ll find information about my results with each paper.
I found somewhere between 360-and 375 seems to work best temperature wise for me.

Below you can see how I fed the sheets – there is a carrier board which came with the laser toner samples, and I used a little v-shaped piece of printer paper slipped over the edge to prevent the leading edge of the foil from shifting, tangling, or melting as the carrier entered the rollers. I found when I tried to put both the paper and foil under a feed sheet (in a folded over sheet copy paper or even tissue paper) I did not get good results. Leaving the foil unobscured from the heat source worked best.
After feeding it through you simply let it cool (I wasn’t always very patient, didn’t seem to do much harm, but better to wait I think) and then peel away the foil. If any ares filled in just lightly brush it with a large medium stiffness paintbrush. In some cases, you can just run the print through again to get any missed spots, but this did not always work so I suspect the issue was more with the toner than the foil/heat/pressure in such cases.
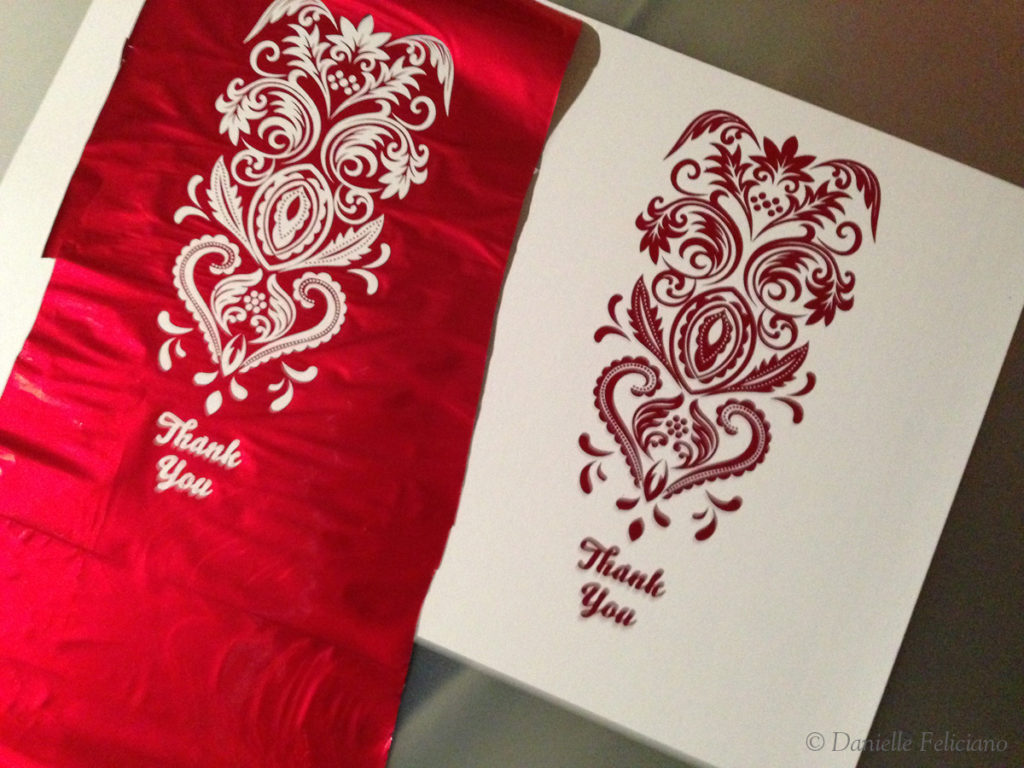
Below you can see an example where the foil filled into the design a little. Some light brushing and it was cleared. Another tip – this process seems to create a lot of static electricity with the foil. Before you feed, run a big soft brush (like mine pictured) over the foil and the static will cause the foil to stay flat and not wrinkle as it feeds (wrinkles cause uneven coverage or streaks)


Important Tips:
> If you can change your toner density, set it to the highest density you can, the thicker and more solid the toner the better results. Most printers can do this somewhere.
> If you want to feed heavy papers you need a printer that feeds straight through (has a manual feed/envelope tray), Many of these heavier papers will struggle to go around the tight curve in a top feed or especially a bottom feed printer.
> Avoid Brother brand printers – they use cheap toner that is much lower in styrene and does not work well ( I tested one or two prints from this machine)
> You should be able to hide any spotty areas by printing the base laser print in a color that matches the foil (only if you have a color laser printer, and are using a lighter/medium colored paper). That way any missed spots will be close to the foil color instead of black and less noticeable.
> Desktop Printers will never feed the accuracy of letterpress or offset, so you will not be getting any hairline line ups if you want to print letterpress after. You could maybe print the design with crop marks, cut to the crop marks, and then feed letterpress with satisfactory results, but why would you go through the torture of hand cutting all those sheets down to the crops?! At that point, just buy a foil stamper and keep your sanity.
> If the design is filling in, you can just brush it away with a medium stiff brush, but lowering the heat may also help a little
> Just like letterpress all problems come from ink(toner), pressure, or paper. You could throw human error and temperature in there too, but generally, if it isn’t working one of those variables is off. You need a LOT of pressure, using an iron seems nice in theory because it’s essentially free, but will be slow going and miserable. In my case, I actually tightened the roller screws on the bottom of my Apache machine to increase the pressure, you could also just use a thicker carrier board.
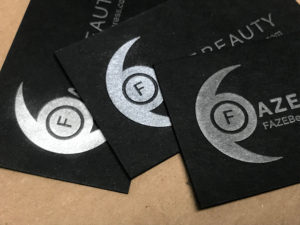
> Don’t feed laser sheets with un-foiled toner on the back through the machine without a carrier sheet underneath – the toner will transfer to the rubber rollers and ghost on your next papers. This happened when I pre-printing the inside of the folder cards. You can always run the sheets through your laser again after foiling if you want to print additional things or foil in a second color. You can actually even print laser ON TOP of the foil itself. Meaning you could lay down white foil on black paper, and then print a color laser image on top.
PAPER TESTS
Here are the papers I tested and the results. I ranked them on consistent success, and per sheet price point.
*Pictures will be coming for these, I just need to get the daylight to take them.
Un-feedable papers, these will NOT go through any laser printer because of weight, but hey I tried – Wild 166lb Cover, Lettra 220lb, Savoy 236lb
Crane Lettra 110lb (☆/$$$$) – Spotty results at best, getting the toner to lay on this paper is almost impossible, and the thick, soft texture means in many cases the pressure wasn’t enough to get the foil into the tooth of the sheet. It was a no go, sadly. I would not suggest it for clients, unless I can fix the kinks, may be ok for single lines of script type.

Michael’s Craft Store Carstock(☆☆/$) – I suspect my main issue was that this thin paper needed more pressure and less heat. Foil seemed to fill in more than on others and was harder to brush out. I wouldn’t waste my time with this since the paper isn’t even really nice enough to warrant me spending the money on foil or the time to foil it. Re-tested with more pressure and it works ok, but still filling in more than the others.


Office Max Double Sided Matte Photo Paper(☆☆/$$) – Worked ok, nice smooth finish takes good inkjet and laser printing which is a plus if you need to have the inkjet print. Not a super heavy paper, light to medium weight and it took a bit more pressure when feeding. There are other papers I liked better but similar adhesion when compared to the Michael’s Paper. Had some spotty areas from seeming lack of pressure, not my favorite because it’s sold in small quantities and the lower weight.


Crane Colors 134lb (☆☆/$$$)- Better results, this is a slightly smoother paper (kid finish) and so I could get decent adhesion in most cases, The downside is that this paper does not come in white or natural, so it can’t be used for most of my wedding jobs. I wouldn’t do it for designs that need large flat color, but it actually worked alright for text/script.


Basis Premium Cover 80lb (☆☆☆/$$)- This paper had a nice heavy weight and feel, close to French in feel. It gave good results. In some cases, great adhesion, and in others it was a little bit spotty. Could probably work with a little extra waste considering the price point of this paper is good and it has matching envelopes in a slew of nice bright colors. Might be worth the effort, as it had better results than Crane Colors and is cheaper.


Strathmore Cover 110lb(☆☆☆/$$)- I only had a single sheet of this to test that I picked up from Lindenmeyer paper. I had some trouble with the black toner being thin early on and so I can’t really confirm or deny in this case. I feel strongly it will work as well as French and I liked the feel, but I didn’t have enough left when I got the low toner problem under control.

French Paper, Construction 100lb (☆☆☆☆/$$) – I would say that this was one of the more consistent papers, and I would feel comfortable offering this an option to a client as it comes in tons of colors, has envelope options and is affordable. Smooth enough finish and good adhesion. I have no letterpress issues with it so I know it will work well when combining processes.


Opaque Digital 80lb Cover (☆☆☆☆/$$)- This is a digital printing paper, but has a nice enough weight/feel for folded cards, or medium invites, slightly lighter/thinner in weight to French Paper but fewer color options, I believe. Pretty consistent, one of the best working papers. One of the only papers that took a decently sharp inkjet print. All others printed inkjet but were a bit soft/blurry.


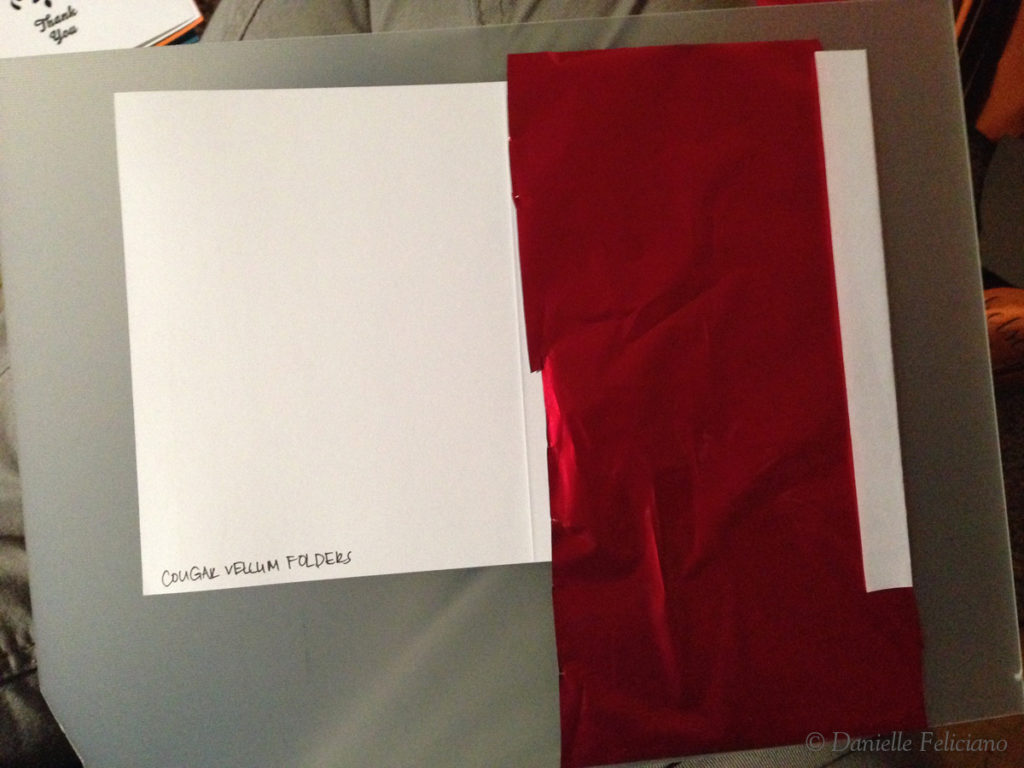
Leader Opaque, Vellum Finish Folders (☆☆☆☆/$) – These were pre-scored lighter weight cards I got from Lindenmeyer Paper. Good results, I didn’t have any issues with this paper, other than making sure it got enough pressure behind it when feeding since it’s a bit thinner. A great option for greeting cards as it comes in boxes of 250, and being pre-scored made it a breeze to use.


Pingback: The Perfect Marbling Mask – Danielle Wethington