I actually did this project a little while ago, but never got around to posting it. After my experimentation with the cheap sizzix dies I got the opportunity to do a job where some custom die cutting was warranted.
Ultimately, the process was exactly the same. The only difference is I had to do my packing a little different and get a slightly thinner sheet of steel. I had my die made by Miles over at Milwaukee Dies. Good price and had great customer service from them. I also had a different die made with Midwest Dies that I haven’t used yet, but is also nicely done.
I believe my die height was .937 or so.

You wont be using rollers or any packing on the platen in most cases so you can go a little higher than type high (.918) in order to make up for the packing.

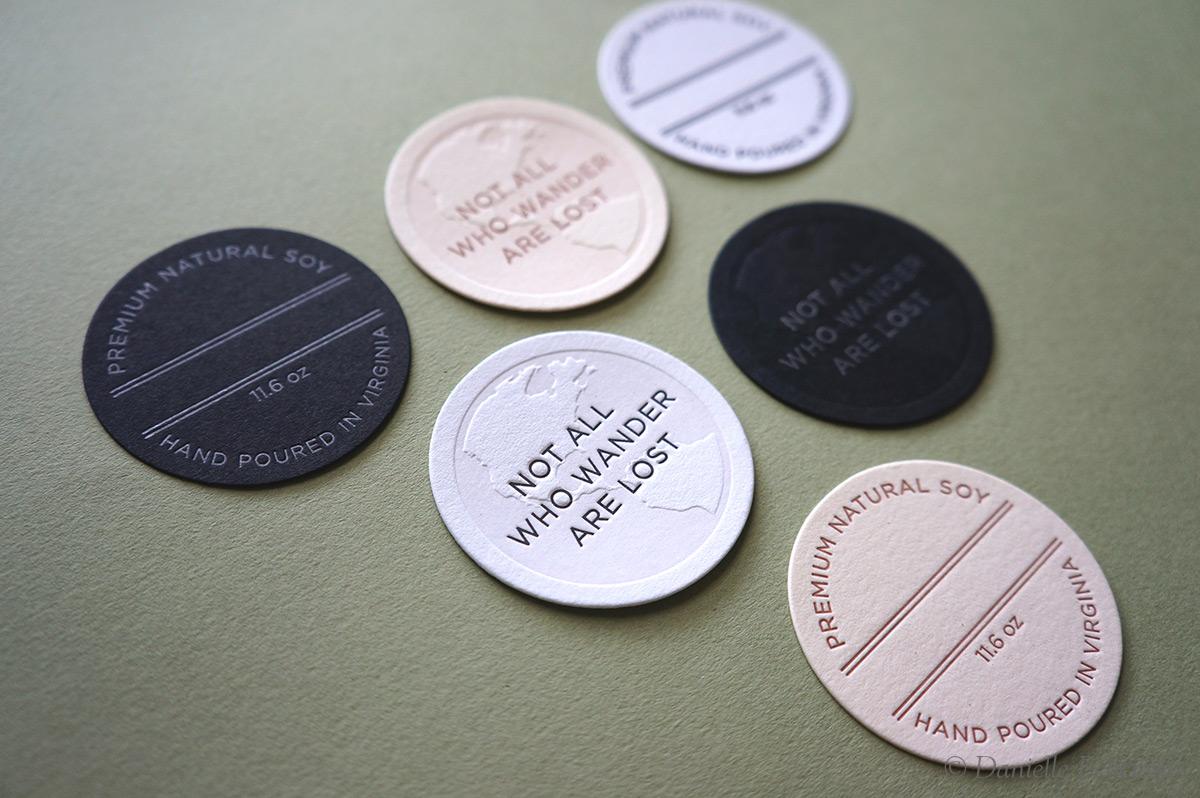
Here I compare a deboss that is tinted vs and un-tinted one (true blind stamp)

So of course the project starts with the printing. Because I needed good line up between the edge of the die and a shape that I had printed in it, I added two registration marks to my printing plate. In this case I printed on Crane Lettra 110lb in Ecru and White and then Colorplan for the black. Using Silver, Bronze, and Black Inks, along with a very lightly tinted blind stamp. I completed the printing in the usual way.

My technique for lining up the die cut is to tape down my ‘steel jacket’ which is really just a steel plate carefully measured and tested to just kiss the die (it should leave a very faint scribe on the jacket). I had to get a couple thicknesses and in my case use some thin graph paper to shim it up at the bottom since my platen is just slightly not level.
After taping down the plate I tape a piece of paper down top and bottom, take a cut, and then position the actual print underneath to line up my compressible pins.


So once that is done, I just feed as usual. In my case I didn’t nick the die, I just fed as carefully as I could and accepted that some would pop out of the sheet as I was grabbing them. The blank center in the globe stand is left plain because the client wants to apply a wax seal to the label. No major problems with this job. The longest part of the process was simply getting the steel jacket and your die properly set so that they take a nice cut without wearing down since I was using a new die that was a different height from the sizzix dies I used before. The press should not feel like it’s working too hard (as is sometimes the case when printing a too large form), it should not bind or be difficult to turn the flywheel through a full cycle by hand. Remember, it’s like scissors – steel on steel keeps it sharp, so avoid too soft packing, or the use of a cutting mat for backing. Fed quite a few of these and found the Crane Lettra cut down without incident.


Where did you pick up your steel jackets? Somewhere local or did you order them online?