So, I wanted to try a little experiment based on a video I saw online. After I saw this I was eager to try a little cheap die-cutting experiment on my 7×11″. Now, if we are being honest, a 7×11″ is too small for die-cutting. Die-cutting puts more pressure on the machine than printing does, and with all the crash printing going on, these machines are probably being worked beyond what they should in many cases. Still, I thought a small die would be ok, if I was very, very careful with how much pressure I put on the machine. Here is what I bought to try this out:
$6 – 1 Original Sizzix Die (3 1/2″ x 4 1/4″ Ornate)
$5 – 1 5×5″ 16 gauge steel plate (honestly it was much thicker than I thought, I could have gone with something half as thick 32 gauge)
Here is what I used in addition to my purchases:
1 8×11″ rectangle of very heavy book board cut into quarters to the size of the die (you could use sketchbook backing)
1 roll of painters tape
Step 1: The first step was to cut down the book board and tape it together into a block. I used three layers at first, but later discovered I need a little more, so I cut down some heavy coaster stock and added that for a total thickness of: .343″


2. This actually puts the object almost at type high – seemingly. The foam padding around the die is actually a little higher than the blade (so people can’t cut themselves, these are craft dies, not industrial ones so the die is completely encased in the foam). My 16 gauge steel plate was pretty thick, so if you’re doing this you will have to adjust for your press, as your platen may be adjusted differently. I locked it up and and carefully checked that even when it was engaged in print mode, it wasn’t going to hit the platen.

3. The steel plate had slightly rough edges from the blade during cutting. I put a piece of paper down and made sure the ‘sharper’ edges were facing away from the platen so it wouldn’t scratch. Then I taped down the metal plate, making sure it was in the right spot to protect the platen.


4. The next step was a bit of experimenting to get the height right, all while being very, very careful. I never turned on the motor and cranked it by hand gently testing the pressure to make sure it was not too tight. I taped some pieces of paper to the platen and found one added sheet of paper behind the plate was just enough to cause the die to kiss the metal plate and leave a very faint scribe. It didn’t feel tight when I cranked the press so I felt ready to move forward.


5. I tested some different paper weights – from letter weight to crane 300gsm and they all seemed to cut through without much fuss. Though the lighter weights die cut much easier, some of the heavy weights got a little caught up. Finally, I took a piece of slick scrap paper (I wasn’t willing to waste a sheet of tympan) and taped it to the platen over the metal plate. I ran a cycle on the press and then set the gauge pins to the die cut. At this point I felt safe running the motor on the press.


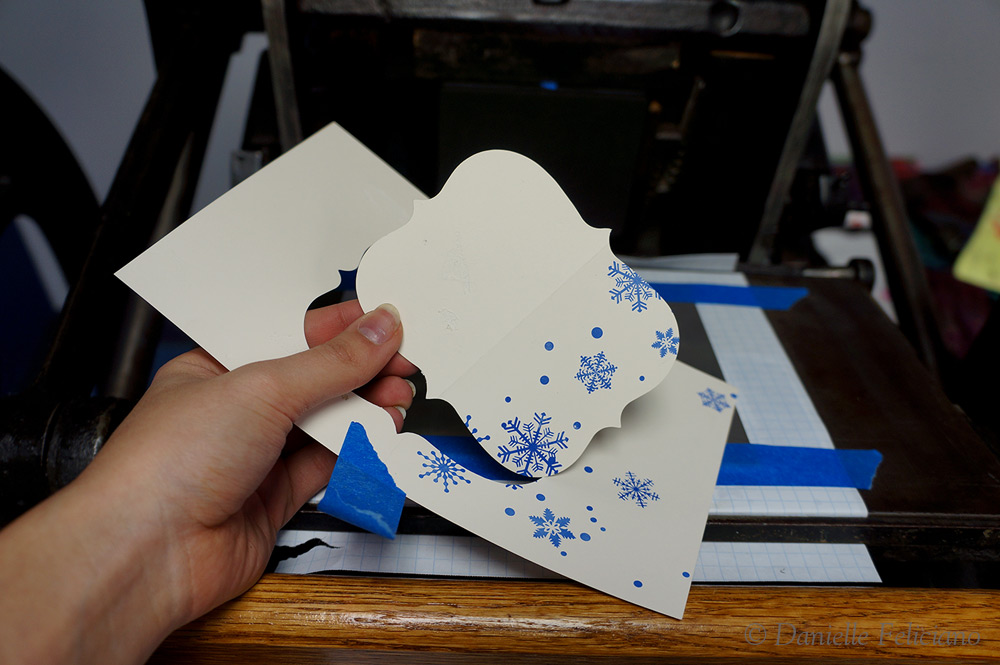
6. I found that the cut outs often got caught up on the top sheet, so I put some tape over the cut edges near the pins. The texture of the tape seemed to help. Also, I let one of the die cuts just sit in the window of the top sheet which also helped with feeding. What I should have done (but didn’t feel the urge to do) was take a triangular file and ‘nick’ the die so that the small hinge/connector could hold the inner cut inside the frame to make feeding easier.


Conclusion:
This wasn’t a very large or a particularly complicated die, and in the end I didn’t feel like it required any more pressure than regular ‘moderate’ impression required -perhaps even a little less. The steel backing was quite obviously – essential. Beyond just protecting the platen, these dies (as all dies do so I hear), need a hard surface to cut against or the dull quickly – wood, cutting mats, or book board will quickly dull the blade. It’s like a pair of scissors – the metal on metal keeps it sharper. This was slower going (by at least half) than printing because you had to keep track of the inner and outer cut when feeding. They also are more likely to catch or misfeed. For a small job of 100 or less I think it’s doable. My tips based on this limited experience are, keep the die small enough for the press, use the lightest possible pressure, and feed carefully. I think it might have been easier if I had just forgone the top sheet all together, it probably would have been fine since I use compressible pins made of foam tape or ordered from Boxcar.

Just discovered your blog and am getting inspired reading through all your tutorials! As fairly newbie printer myself, I’m loving the step-by-step details on these processes. Thanks so much!
Reblogged this on One for sorrow / Two for joy and commented:
This is genius! I have to try this.
This is great! Any chance you would be willing to show a video tutorial on this? All of your videos tutorials are so well done. Thanks, again! – Joe
This is great! Do you think you would be willing to create a youtube tutorial on this someday? Really enjoy all of your thorough videos 🙂
-Joe
Joe,
It’s on the roster of things I would like to do a video on so keep an eye out!
Looking forward to it! Thanks, again!